“NO BOOK IS REALLY WORTH READING AT THE AGE OF TEN WHICH IS NOT EQUALLY (AND OFTEN FAR MORE) WORTH READING AT THE AGE OF FIFTY” – C.S. LEWIS

LITTLE FREE LIBRARY UPDATES


BUILDING A LITTLE FREE LIBRARY
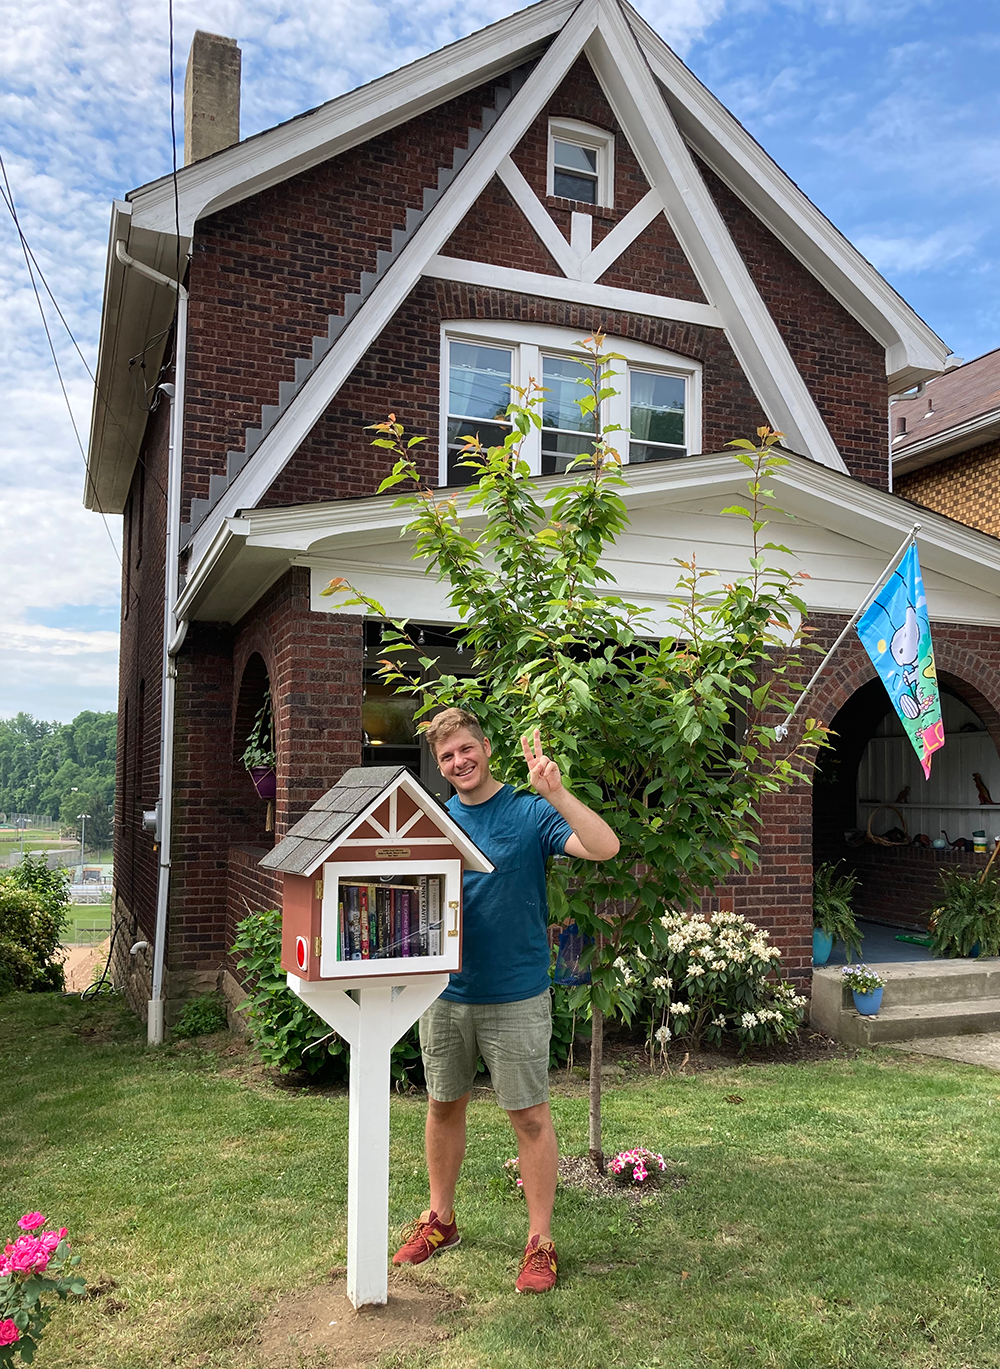
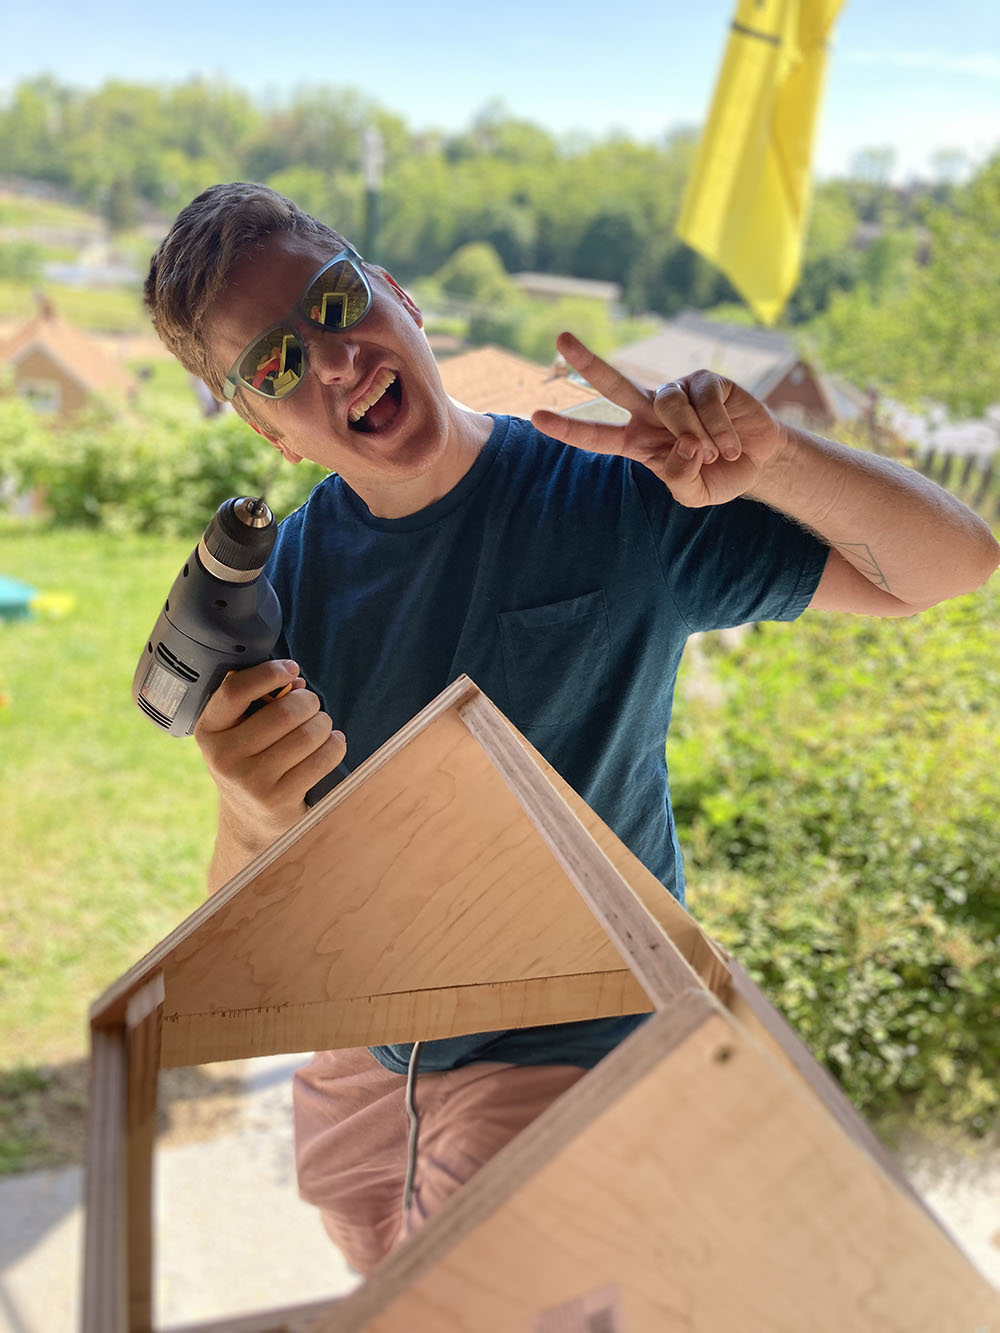
I just finished building a Little Free Library with Agent Rachel! We’d been wanting to build one for a long time, but it always seemed — ironically! — like too big of a project… but it was actually pretty fun and not too hard (especially if you have access to a couple of power tools).
If you’re an adult (or reading this with an adult) and are interested in building a Little Free Library, here’s how we did it:
1) Unless you have a lot of the building supplies you need (we had roofing material in our basement, but the wood was a little pricey), it might actually be cheaper to buy a Little Free Library from the official shop. We had fun building ours and trying to make it look like our house, though!
2) I googled around until I found a Little Free Library that I liked as a model. This blog post was what I looked at the most – and it gave us a good idea of what to expect in the build . . . but, true to form (for me, not for Rachel) we decided to build without a specific plan outside of knowing generally what we wanted the library to look like.
I did take a screen shot of the materials list from these Little Free Library instructions, though, so we’d have a starting place in terms of the supplies we’d need when we went to the hardware store (in terms of screws and plywood and brackets, etc).
We didn’t follow those instructions… but we figured any design we’d come up with would call for basically the same supplies, so we started from there!
3) It’s not so hard to build a box – especially if you have access to a drill and a power saw (I have a little jigsaw that we used for most of this build). It’s the pointy parts that are a little harder 🙂 For a little bit of help knowing how to build a gabled roof, I studied the pictures in that blog post I linked to above and I also looked at this one.
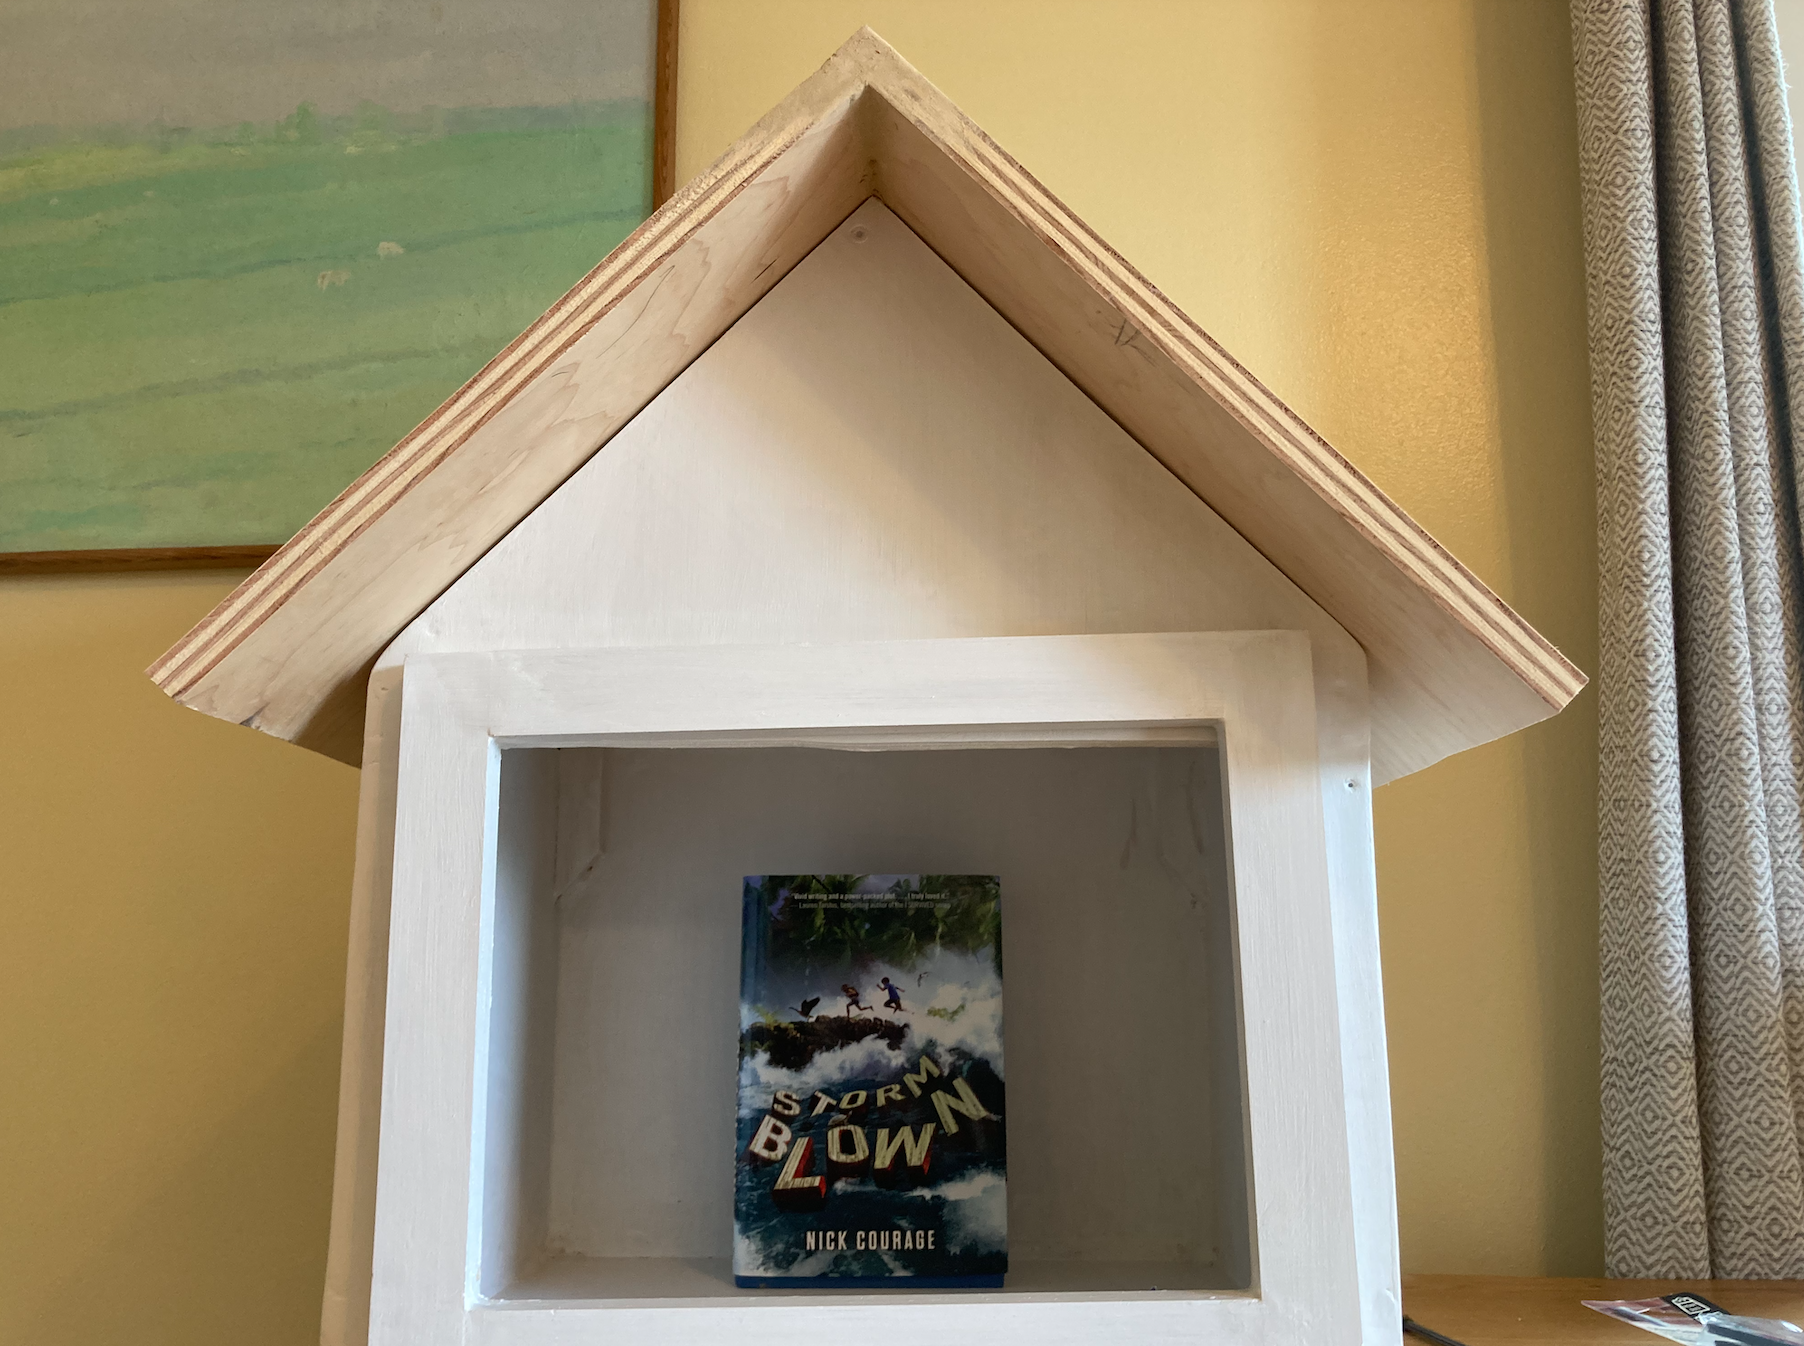
4) Learning as you go is part of the fun, so it’s okay not to know everything going in. I didn’t know how to cut or mount plexiglass (pro-tip: you need a “plastic” drill bit to drill through plexiglass) or build a door or a roof. And I definitely didn’t know how to lay shingles! But all of that stuff was pretty doable – even if I did end up having to buy two extra sheets of plexiglass for the window – and it felt good to learn how to do it.

5) When you paint the library, using exterior house paint will help waterproof it. We also rubbed wood putty or caulk along joints to make extra-sure that the library’s waterproof. So far it’s rained a couple of times and everything’s super-dry — and if you want to make sure you’re keeping your library dry, having the roof stick out a few extra inches helps!
6) The post was probably the hardest part for us to get right because my little jigsaw wasn’t big enough to get through the wood — and I had to cut the wood (and figure out how to cut wood that thick) at 45 degree angles.
For the post, I ended up using a handsaw — and because I was more-or-less measuring once and cutting twice, I ended up having to do more cutting than I would have needed too if I had planned everything out a little better. I think we figured out that we hand-cut through about three feet of wood before we got the post right!
To build the post, I used these directions from Little Free Library.

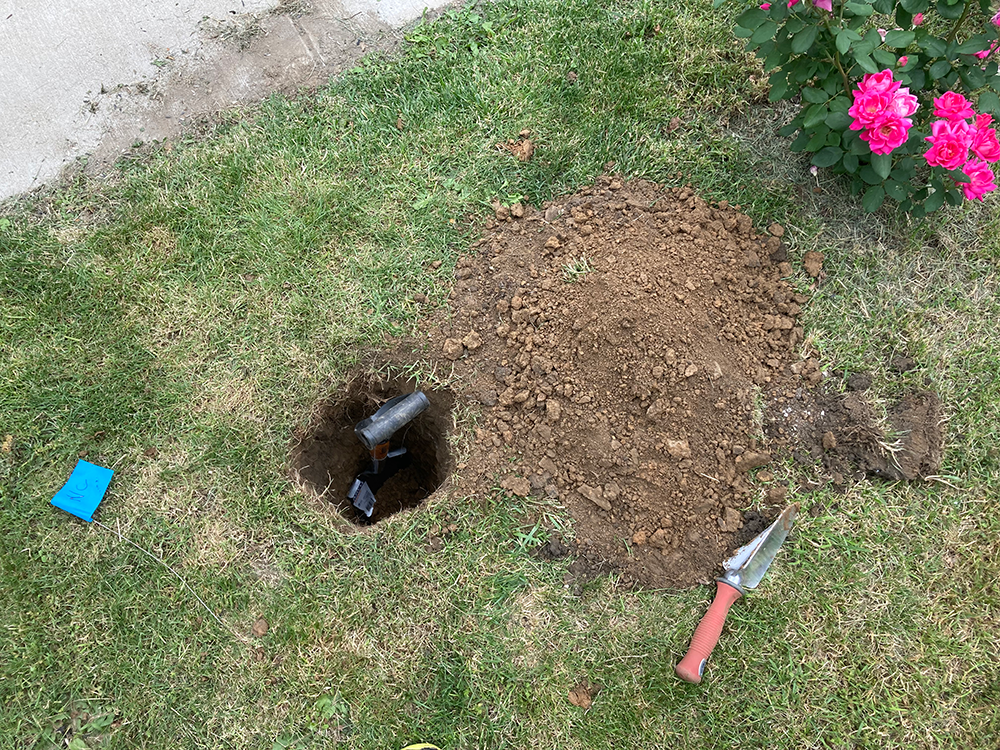
7) Digging the post hole was the final step – and it has to be deep!
2 feet deep is a lot when you’re digging a little hole through clay and rocks, and before we started digging, we had to contact our utility companies to make sure we weren’t going to dig into a water or a gas line. There’s a free service called “811” that we used, and I was able to submit an “excavation ticket” online. It took about a week for the utility companies to tell us where we could dig without worrying about hitting anything.
The hole is deep enough that you don’t have to use concrete or anything to keep the library in place (and our library is pretty heavy!) — it’s sturdy as a rock once you fill the hole back in with dirt.
8) The next-to-last thing we did was install a little light with a motion sensor in the eaves of the roof, so when someone opens the library door at night, the library lights up. There are a lot of options out there for motion detecting lights — a lot of people use them in closets — but the light we ended up using was about fifteen dollars and runs on double A batteries that should last about a year (we attached it with velcro strips for easy battery changing).

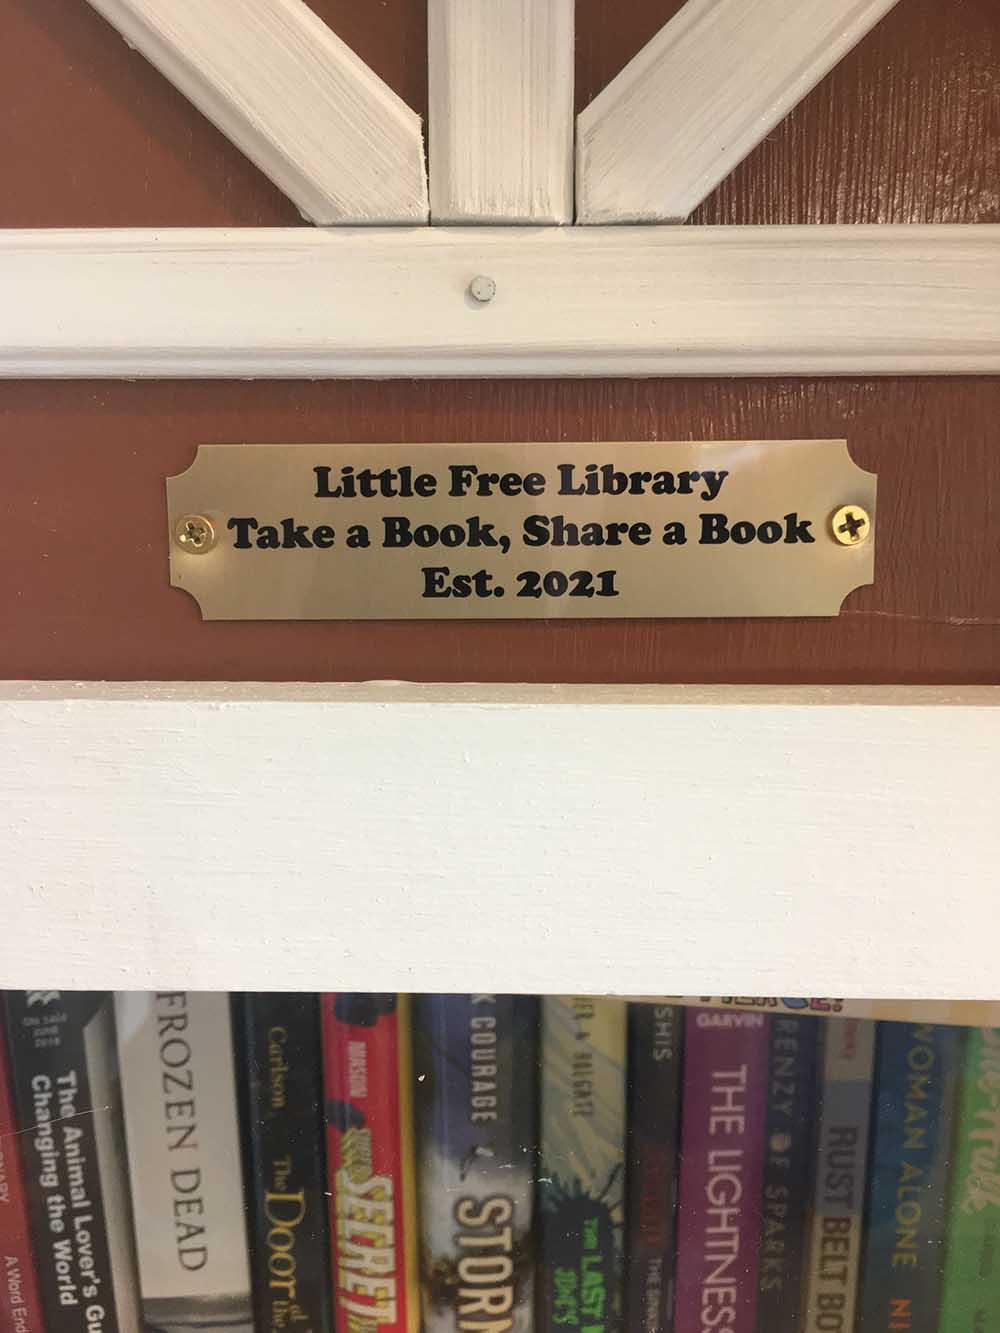
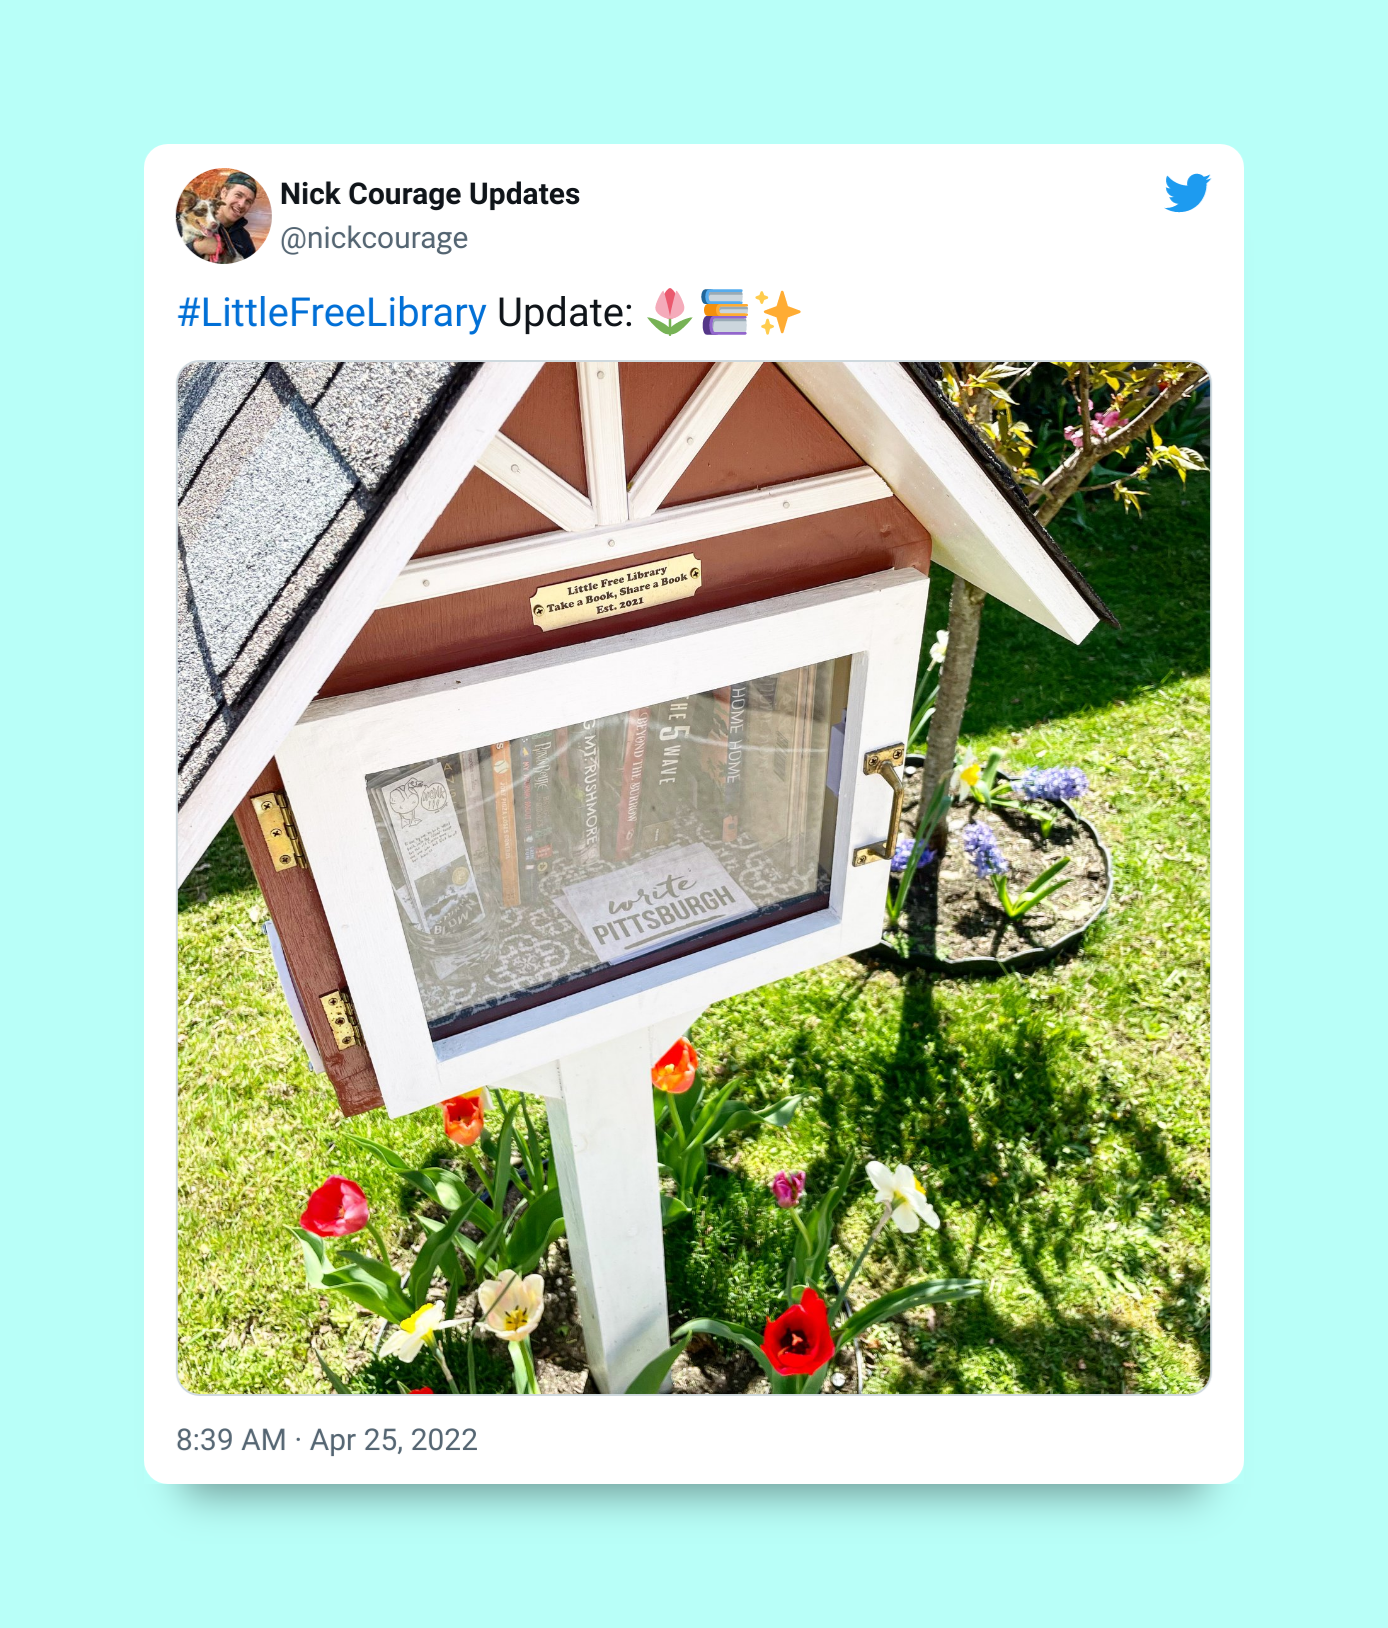
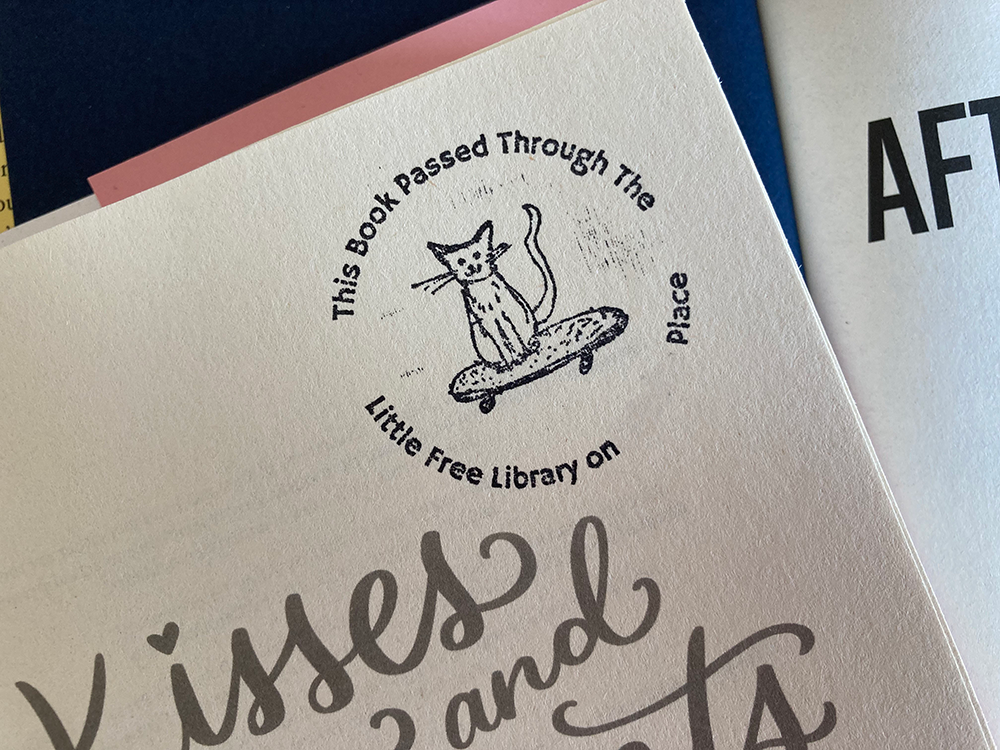
9) I love personalized stamps (if you did any preorder stuff for my last books, you probably got something stamped!) so to add a little something to the books in our Little Free Library, the last thing we did was order a custom stamp.
For the art, we used a cat on a skateboard that Rachel doodled a long time ago. It used to be the logo for my website and I used it on a one-off skateboard line that I designed a few years ago – so it’s a little cat that we really like a lot, and it looks so fun on a title page (our street name is blanked out in these pics)!
This isn’t a comprehensive list of everything we did to build our Little Free Library.
For a lot of the process we were covered in paint and sawdust and didn’t have a free hand for pictures… and I didn’t get into “roof felt” (I have a big roll in our basement now because they sell it in spools that are more suited for a normal-sized roof) or how to cut and hammer asphalt shingles or anything like that.
But this is basically how we did it! If you’re thinking about building a Little Free Library, don’t be afraid to make mistakes and learn as you go — but just know that you’ll probably be making two or three more trips to the hardware store than you expected 🙂